


The following is a method example, not a Lanhe project. A plan shows one level doorway between SPC and laminate and another opening with a step. The profile question is geometric before it is visual. Mark both joints, measure finished surfaces and keep the floor build-up in the drawing. In the same method example, the level joint and the stepped joint receive different IDs on the plan. That prevents the color decision made for one room from being copied into the other detail.
Start with the floor plan and transition conditions
Room area will not produce an accessory take-off. The plan needs each doorway, exposed edge, stair and perimeter. Label what meets at each point and note the installed height. Put a room or drawing ID beside the mark. That gives the supplier a reason for each T-moulding, reducer or skirting line in the quote, and gives the installer a location to check.
Same-level joints need a clear bridge
A level doorway is not automatically a T-moulding job. Measure the opening, compare it with the section and check how the selected system handles movement. If the drawing leaves coverage or clearance unanswered, the line is provisional. Resolve the gap while another section can still be selected. Note whether a door leaf, casing or cabinet limits usable width.
Height changes need a reducer review
For a reducer, send the height of each finished floor and include attached backing or underlay. The difference is the condition the section must accommodate. A cross-section with both floor faces, reducer slope and fixing line is more useful than a product photograph when the step is small. If height varies, record high and low points and state which controls the quote.
Perimeters need a skirting plan
A perimeter take-off is more than adding wall lengths. A doorway interrupts a run; a corner needs a turn; an exposed end needs a termination. Show those pieces on the drawing and note the expansion space. For a long wall, list each run between interruptions rather than one rounded perimeter total. A cutting diagram follows after the pieces are known.
What to specify for each accessory
| Accessory | Buyer must define | Evidence to approve |
| T-moulding | joint condition, finished width, floor heights, finish | full profile sample beside both floors |
| Reducer | height difference, cover width, slope/edge shape, finish | section sample on the actual floor build-up |
| Skirting | height label, wall length, corners, color and fixing method | straight piece plus corner or end detail |
Lanhe’s skirting page shows 50, 60, 70, 80, 90 and 100 as option labels. Those labels do not establish unit or section dimensions. A dimensioned drawing belongs in the quote, with a note explaining what the number represents. This prevents a catalogue convention from being mistaken for finished height or width.
Match appearance without assuming identical decor
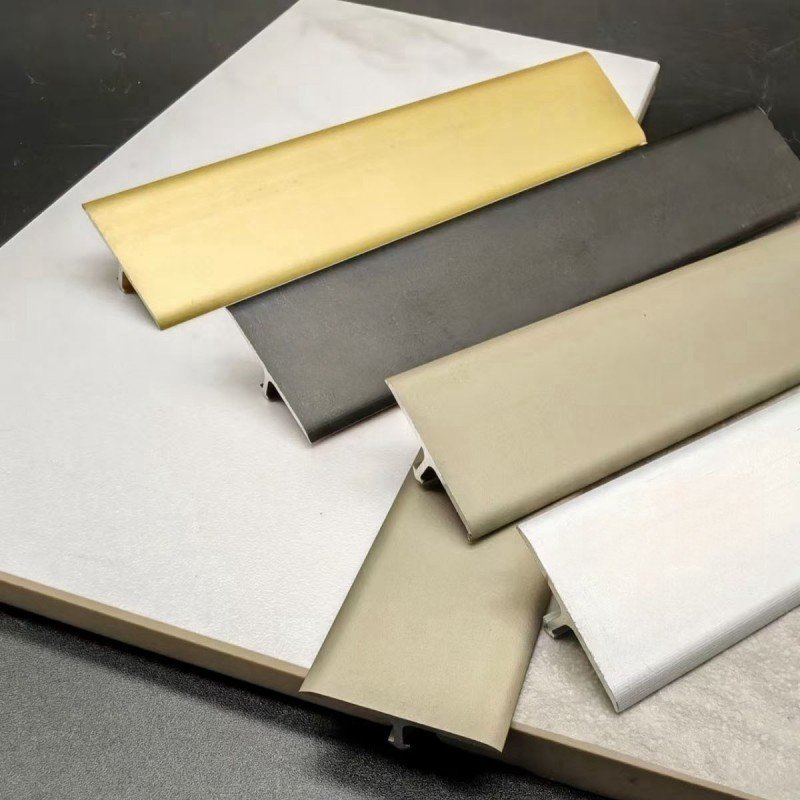
With the profile size settled, decide what the room should look like. A trim can blend into the floor or outline it. Put the physical plank and profile together in the room light and save the approved samples. Record sheen and texture beside the color reference; a close color can still look different beside a matt or embossed floor. If the intent is contrast, name which adjacent floor controls the comparison.
Use samples that show the finished edge
For a joint with a visible slope, review a reducer section, not only its color. For a wall, look at the corner and end condition. The small piece reveals the turn and termination. Bring the measurement and intended orientation to the review, including a casing return when it remains visible. The sample answers appearance; the drawing answers fit.
Check installation and package compatibility
The fixing line is part of the installation detail. The quote should say whether the profile clips in, uses a channel or needs another component, and the drawing should show clearance against the floor system and movement space. A substitute can then be checked before it reaches the doorway. The method example also records whether the selected component can be replaced without removing adjacent flooring. That is a maintenance question, but it can influence the channel or fixing detail chosen at the start.
Confirm lengths per carton and protection for transit. Count straight lengths, corners, caps and custom pieces separately. Receiving can then match the carton count and piece count to plan locations. Photograph damaged packaging before pieces are mixed into the work area and retain the carton code for any replacement discussion.
Build an RFQ line-item list and quantity check
Plan location for each doorway, edge or wall run.
Profile section and dimensions matched to floor heights.
Finish reference and physical sample approval date.
Straight pieces, corners and terminations shown on the plan.
Measured run, cutting allowance and quantity calculation.
Packing count and process for documenting damage.
Mark each line on the plan and keep the drawing with the quote. If the layout changes, the revision changes the count. Two rooms with the same floor area can need different trim because one has more openings and corners. Check net run, cutting allowance, carton conversion and spare pieces, and name the approver. Keep a superseded drawing when a second measurement explains a quantity change.
How Lanhe can support accessory selection
Lanhe’s accessories page lists T-moulding, reducer and skirting; its SPC and laminate pages list flooring fields that affect the transition. For comparison, send every supplier the same plan revision, measured heights, finish preference, profile type, confirmed unit, section dimensions, length per piece, carton count, fixing method and lead-time assumption. A matching RFQ shows whether a lower price reflects a smaller section or fewer included parts.
If a standard profile cannot span the measured condition, a custom section needs both drawing and physical sample. The sample answers appearance; the drawing answers fit. Retain the pair and ask how finish and dimensions will be matched on a later reorder. The person approving appearance should date the sample, while the drawing carries the measured opening and revision.
Conclusion
At order release, every plan mark should connect to a profile, size, finish sample, fixing parts, carton count and allowance. The installer can see a proposed substitution before fitting it. For a visible edge, one approved section sample with the paperwork is more useful than a color name stored separately. The buyer, receiver and installer then work from the same location marks.
FAQs
Can one profile be used for every room transition
No. A flat joint, a step and a perimeter edge describe different geometries.
Do the numbers in a skirting name prove its size
No. Confirm the unit and complete dimensions on the technical drawing.
Should the accessory color exactly match the floor
Both are design choices. Record whether the approved target is a blend or a deliberate contrast.
